How to make a metallic car paint in V-Ray for SketchUp.
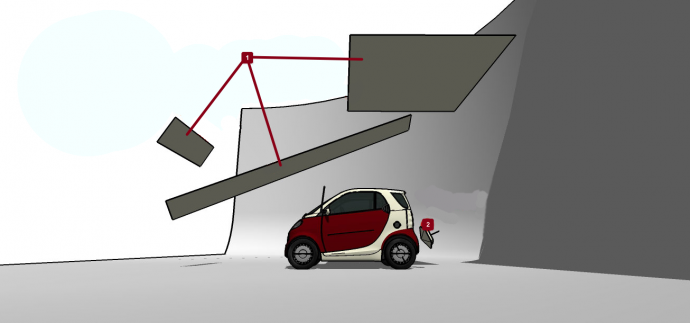
Let us take a look at car paint in real world. Metallic car paint material has two layers of reflection. A metallic layer[2] that holds the base colour and has “metallic reflection”. Plus a coating layer[1] that gives it a sort of polish to the colour and in fact is another reflective, and is also glossy in appearance.
In this image you can see the metallic base colour and lacquer reflections in action.

Whereas a default V-Ray material has three layers including: Diffuse, Options and maps as you can see in the image below:

So we need to add two layers of reflection: A metallic layer with a lacquer layer stacked on top. We can do it using right-click on the base layer and choosing “Create layer”[1] option, then add a “reflection” layer[2]:

Give each layer a name to distinguish them easier in the material editor in V-Ray. Your material should now exhibit the follow result:

Now let’s take a look at the settings. On the upper lacquer layer just reduce the glossiness amounts to add the slightest of blurriness. I found a value of 0.95 enough.

Then on the metallic reflection layer set the IOR value to 4, and I choose a pale pink as Filter colour. You can also tweak the glossiness value to your liking. I used a value of 0.75.


With the metallic car-paint material ready to use we can look at creating the studio setup. Below is a test render of the metallic paint.

How to make a studio setup in V-Ray for SketchUp
In this scene the lighting includes 3 rectangular lights and a spot light. Each positioned to offer the best reflective highlights.
For the car front lights I used a light emitter material assigned to the light bulb volume of the car model.

Adjust emission values / change colour / dimensions of the lighting. Finally set up their shadow quality by changing the light subdivide value.

I tweaked the final render using Fotor. This free online image editing tool allows for instagram type filters, cropping, rotating and lens effects.So even somewhat drab and boting images can get a new lease of life!

For more basic information and fundamentals of V-Ray please take a look at my V-Ray for SketchUp book.
Interested in more or different studio setups and car rendering techniques? Take a look at my complete book on car rendering tips and tricks for V-Ray.


 / (
/ (

