In SketchUp, components can only automatically cut holes on single faces as demonstrated in this tutorial. Even when it comes for openings to cut holes on both outer and inner faces of a thick wall, we need to use workarounds as described in this tutorial.
Now as components cannot even cut holes in round surfaces, we need to truly intersect our openings into these objects. In this tutorial, we'll show two ways (one for users of the Pro version and one for those of the Free version) how to cut a simple window into a curved (cylindrical) wall.
Using Solid Tools (SketchUp Pro)
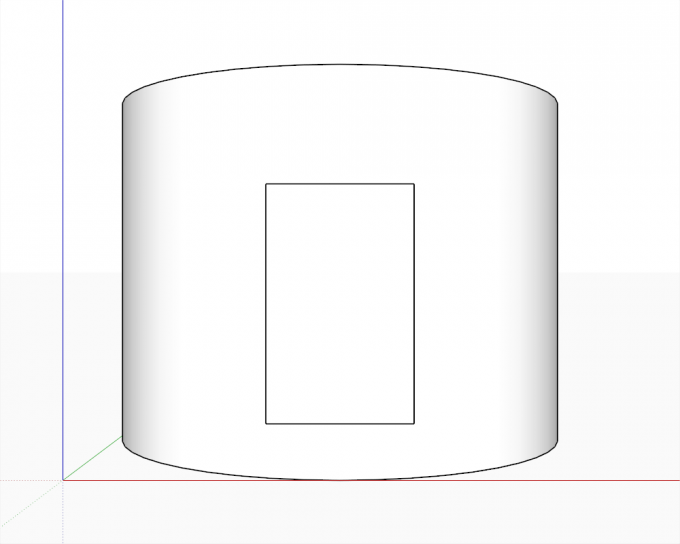
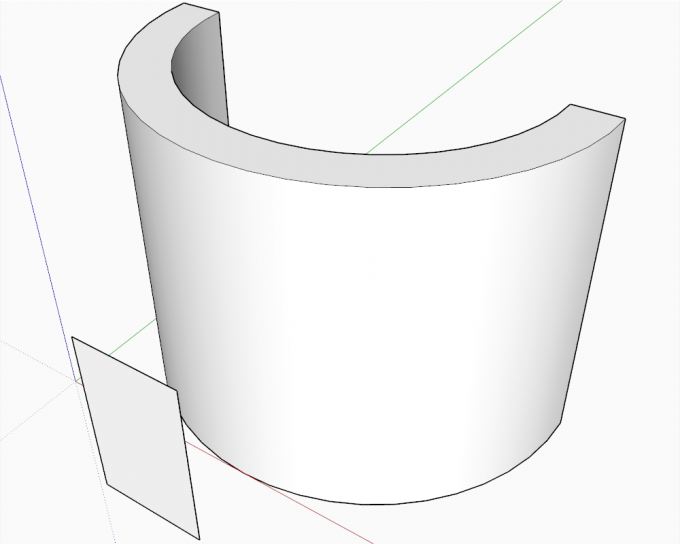
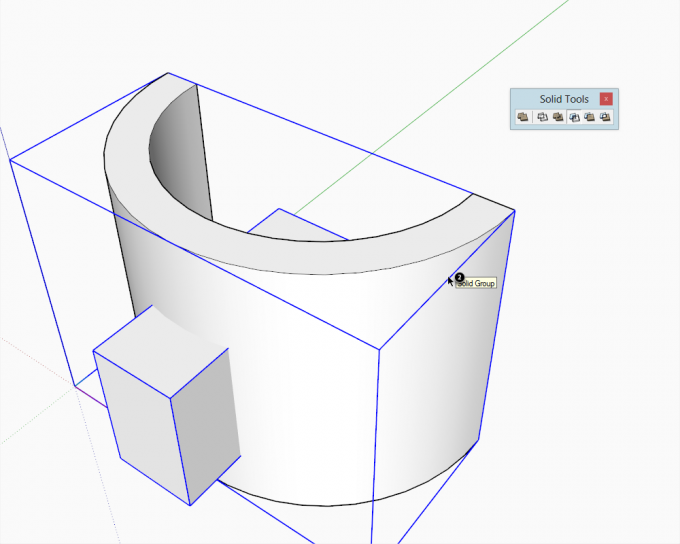
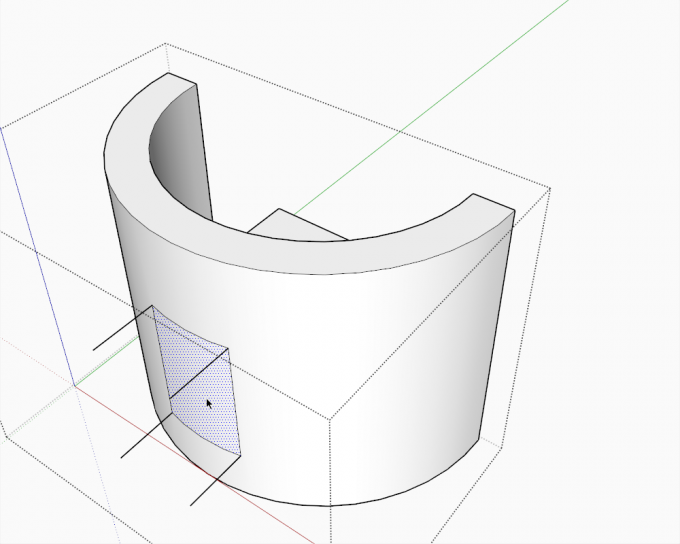
First of all, we draw our wall and draw the outline of the future window carefully positioned before the wall (if needed, use Parallel projection and one of those Standard views in order to be able to do this precisely).
See that I placed the rectangle well in front of the wall to make it safe and get all the intersection nice later. Make sure to make a group of each object already at this stage (you could make components, too - they will be made unique once the boolean operation is done).
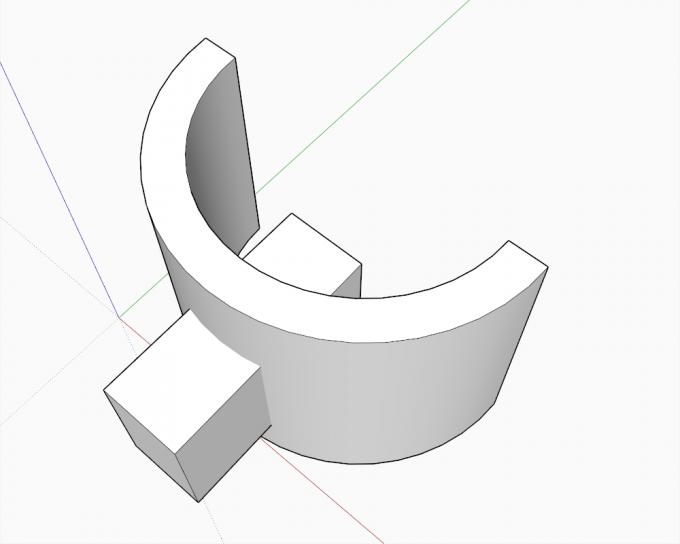
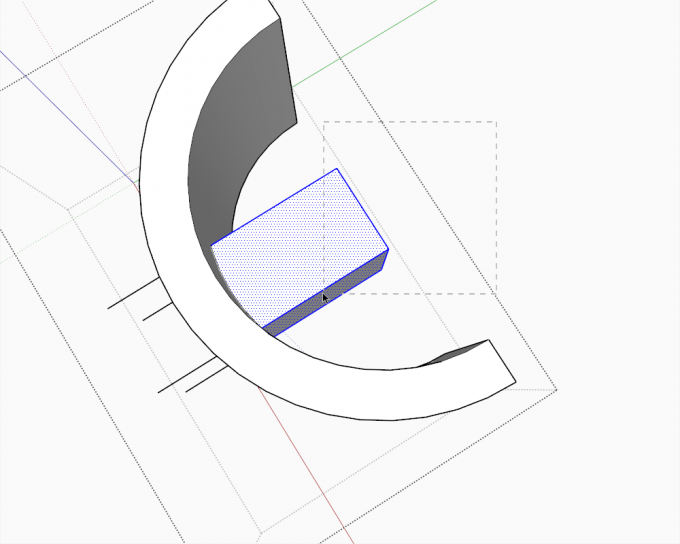
Edit the rectangle group and PushPull it way through your curved wall. At this point, each groups must be solid otherwise Solid tools will not work.
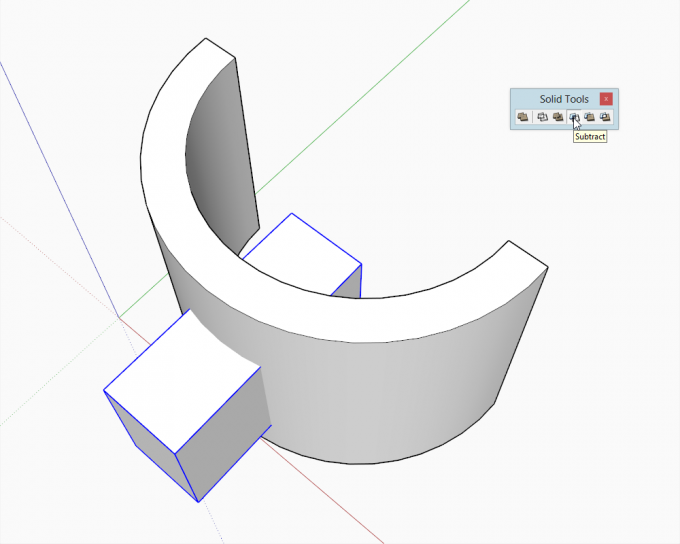
Now select the Subtract tool and first click on the "window" group (or alternatively, start with the window group selected already and then select the Subtract tool).
Next select the round wall group (in the screen shot, I am still hovering over that group only - notice how SketchUp "reports" that it is a Solid group - with non-solids, these tools won't work at all and you may need to use the traditional "Intersect" method described below)
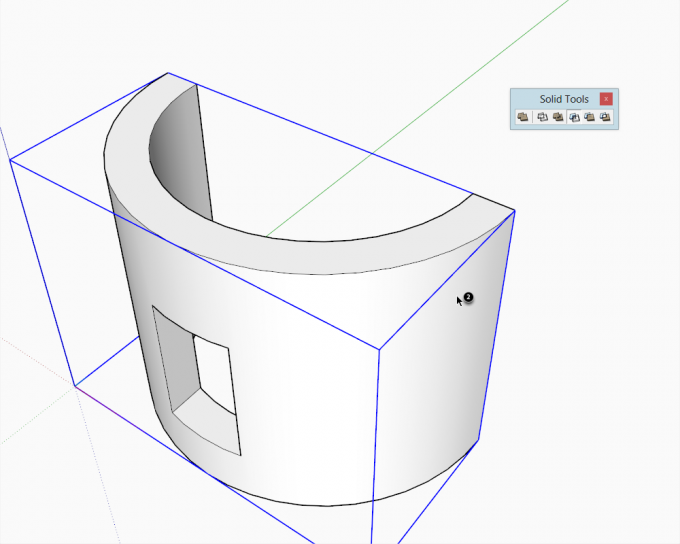
Click once and the window group is subtracted from your curved wall group leaving an opening whose inner sides are also created ("borrowed" from the window group) and even the face orientation is changed so you end up with a nice, clean model which is still a "solid".
Using the Intersect Method
If you do not have SketchUp Pro (or one of the other boolean plugins suggested below) or if your groups are not solids (and it would be too tedious to fix them), you can accomplish the above result using the Intersect tools in SketchUp. First of all, a few words about intersection: it can only be performed in the same editing context you are in. If we intersected the two groups above while outside of either's editing context (at model level in this case), the intersection lines would be created outside their editing context, too thus not affecting their geometry "inside" - i.e. you could not delete individually cut faces.
Now in order to avoid this, I had already moved my window group inside the curved wall group (Ctrl+X to cut > edit the curved wall group > and Edit menu > Paste in place to paste it into the same place - note that you can assign a shortcut for this like Shift+Ctrl+V to easily remember) then exploded the window group so all its geometry is now in the same editing context as the geometry of the curved wall).
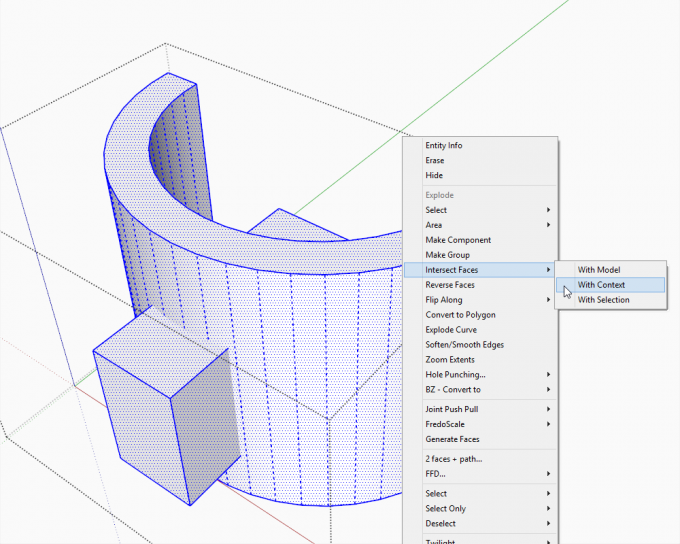
Select all inside (triple click on each the window and the wall while holding the Shift key), right click and select Intersect > with context (in our case). In fact, in a fairly empty model like mine, any of the three choices would work but "intersect with context" will make sure that no other geometry outside these two groups will interfere.
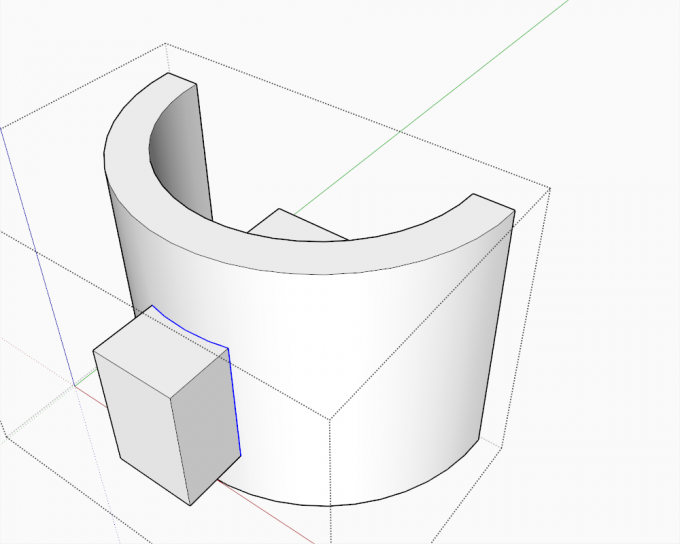
Now after the intersection, you can immediately see the edges that were created (highlighted in blue below) and which now form the edges of faces (and facets in the curved wall) that are nicely separated and can be deleted without deleting useful geometry.
Starting to clean the model up by removing unnecessary geometry. This can of course be a tedious job with more complex stuff but this happens when someone uses the Free version or models in a sloppy way (not with solids).
Sometimes we are lucky and can select whole chunks of geometry to delete together...
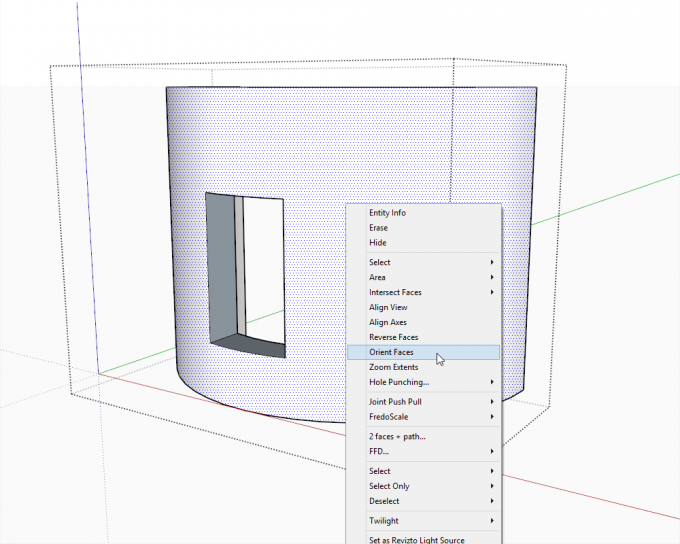
Finally we and up with the proper shape but since the original window group used to have its front faces outside and now we can see its inside (back) faces, we have one more step: right click on a properly oriented face and "Orient faces" from the context menu. If you have modelled more or less tidily till now (and your wall is still a solid), this will fix it.
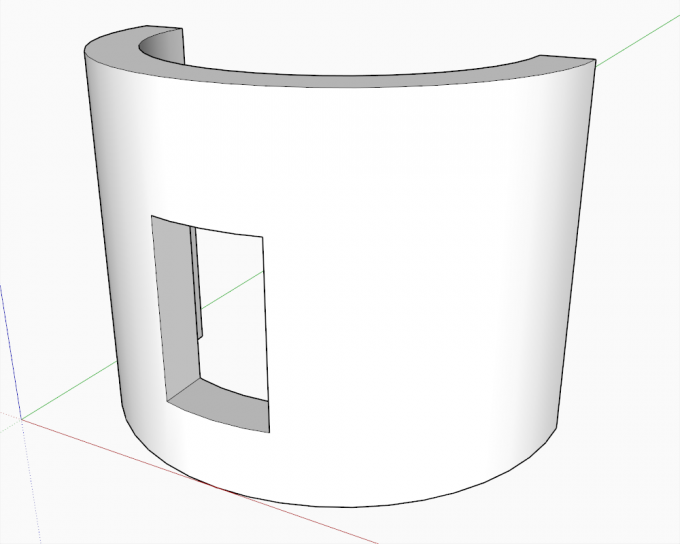
Finally, the clean model with its properly oriented faces.
Alternative Plugins
If you cannot afford (or justify) the price of SketchUp Pro, there are alternatives to the native Solid tools plugin:
- Dale Martens' BoolTools ($10 at Smustard) or
- oscarlok's Boolean OSCoolean (freely available for registered members).
Registered members can add their thoughts and ask questions in this forum topic.


 / (
/ (